


行业解决方案
查看所有行业解决方案
IDA 用于解决软件行业的关键问题。
发布时间:2022-10-15 10: 36: 07
Starting from IDA v6.2,the callgraph of a program can be displayed in a graph form.
In the proximity view,the current address,the callers and the callees are represented as a collection of nodes linked together with edges.Nodes represent functions and data references(global variables,strings,etc..)and edges represent code or data cross-references between them.
To open the proximity view press the'-'key to zoom out and switch to the callgraph of the address under cursor.
Only the address names(function names or data labels)are displayed in the proximity view,but not the disassembly,nonetheless,hovering the mouse over a node will display brief disassembly listing in a resizable hint window.To see the complete disassembly listing switch to text or graph mode by pressing'+'or Space respectively.
When disassembling new files,IDA will display a dialog offering to switch to proximity view when applicable.It is possible to turn off this dialog and not show it again.
In the proximity view there are 3 types of nodes:Function nodes,data nodes and auxiliar nodes.Function nodes are rectangular and they have a toolbar.Those nodes are used to display the callers or callees of the current central node(or any of his parents or children).Data nodes are rectangular nodes(without a toolbar)and they are used to display the data references(global variables,strings,etc...)to/from the current central node or any of his parents and children.
Please select one of the following topic to learn more about graphs:
Selections in graphs
Many graph operations are applied to the selected nodes.The current node is considered to be part of the node selection for all operations.
The graph nodes can be selected using the mouse.To select many nodes at once,press and hold the Ctrl key during the mouse operation.The Alt key removes nodes from the current selection.
Internally,IDA keeps track of the selected nodes and edge layout points.Edge layout points are the points where edges are bent.If the current selection is moved in the graph,the selected edge layout points are moved too.
The default color for the title of the selected nodes is light gray.Other node titles are displayed with white color.
Zooming graphs
The graph can be zoomed in and out.There are several ways of zooming the graph:
-Use Ctrl-Wheel.The current mouse position will be the zoom center
point(i.e.this point will not move during the zoom operation)
-Use the predefined'Zoom 100%'and'Fit window'commands.They are
available from the right-click menu or by their shortcuts:'1'and
'W'respectively.The current mouse position is the zoom center
point for the'zoom 100%'command.
-Use Ctrl-KeypadPlus or Ctrl-KeypadMinus keys.The current keyboard
cursor is the zoom center for these commands.
-Use Ctrl-Shift-drag.This lets you draw a rectangle to which IDA
will zoom.
There are two options linked to the graph zooming:
-Auto fit graph to window:will fit the current graph to the window
size.Default:off
-Fit window max zoom level 100%:the'fit window'command does not
use zoom levels higher than 100%.Default:on
The zoom level is never greater than 1000%and less than 1%.IDA remembers the current zoom level for each location in the navigation history.
Scrolling graphs
The user can pan(shift)the graph by clicking with the left mouse button on the graph background and dragging it.In the rare case when there is no graph background visible on the screen,the Shift-click can be used to move the graph.This can happen on very high zoom levels,when the current node occupies the whole window.
The mouse wheel scrolls the graph vertically.If the Alt key is pressed,it will scroll the graph horizontally.
The Page Up and Page Down keys scroll the graph vertically.The keyboard arrows can scroll the graph if they reach the node border and cannot jump to another node in the specified direction.
Scrolling the graph does not change the keyboard cursor position.As soon as the graph is refreshed on the screen,IDA will scroll the graph so that the keyboard cursor becomes visible.
Graph overview window
IDA has a small graph overview window.It displays the whole graph in the zoom out form and gives the user an idea about which part of the graph is visualized on the main window.
Clicking on the graph overview window visualizes different parts of the graph in the main window.It is also possible to click and drag the focus frame-the main window will be refreshed accordingly.
The graph overview window is visible only in the graph view node.As soon as another non-modal window gets focus,the graph overview is closed.It automatically opens when a graph view is activated.
The graph overview is displayed by default.To hide it,right click on the main toolbar background and select Navigation,Graph overview menu item.
The graph overview window can be resized to accommodate really huge graphs.
Graph colors
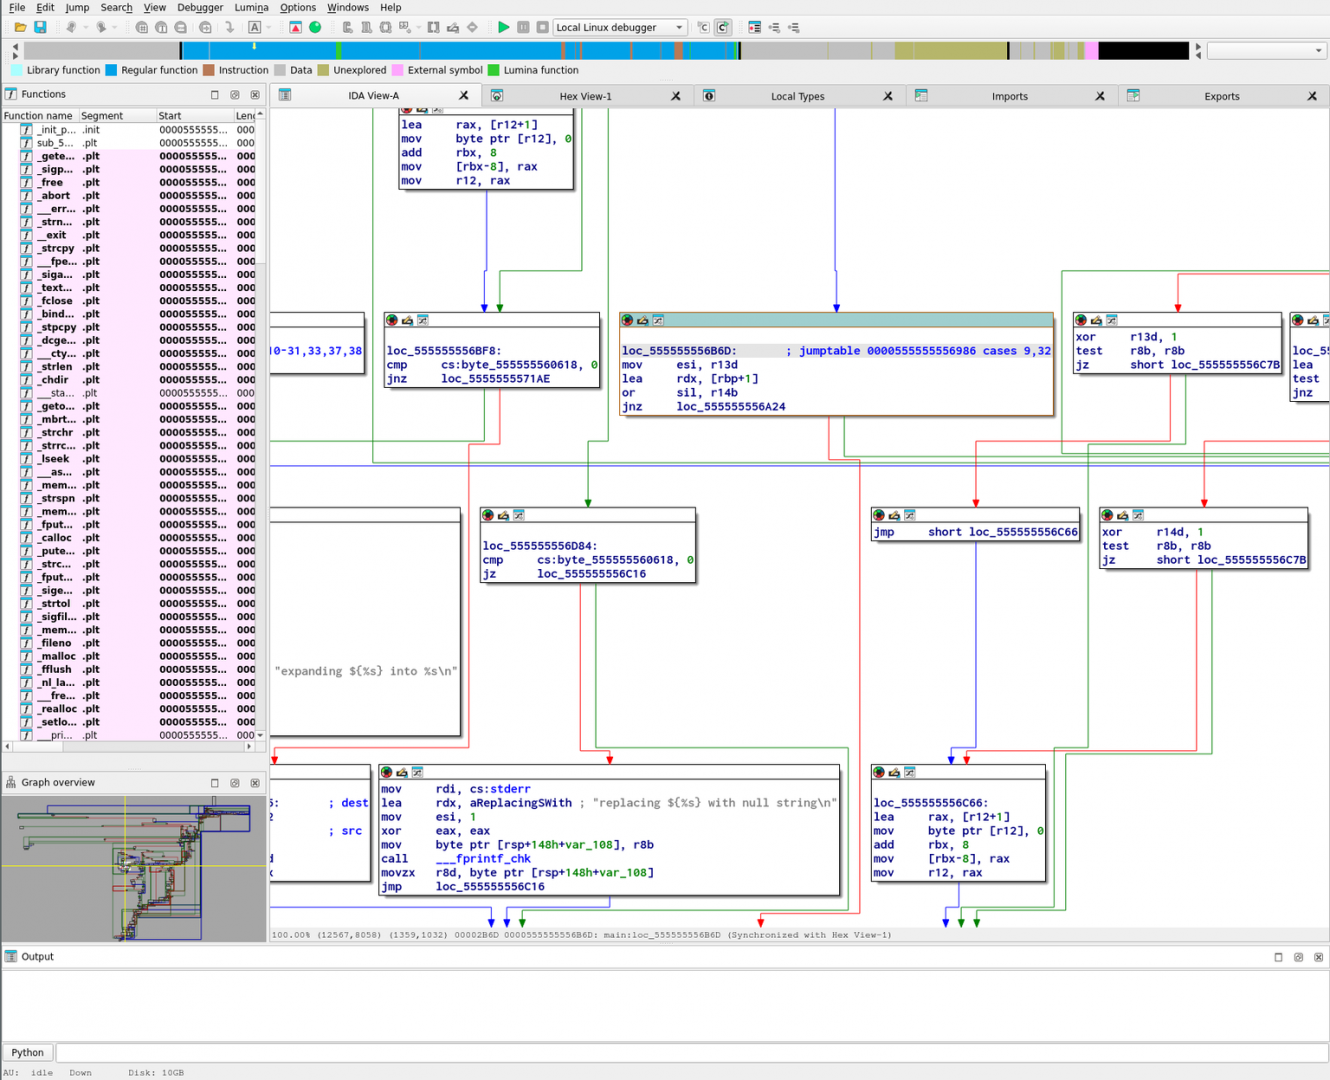
Graph edges can have several colors.In graph view:
-Blue:a normal edge
-Green:if the jump is taken(its condition is satisfied)
-Red:if the jump is not taken
-Blinking:when in the debugger,the edge that will be followed blinks
And,in proximity view:
-Blue:Code cross-reference edge
-Gray:Data cross-reference edge
IDA highlights the current mouse items.If the mouse is hovered over an edge,it is highlighted.If the mouse is hovered over a node,all adjacent edges are highlighted.To turn off the highlighting,specify the'current edge'color as an undefined custom color.
The'highlighted edge'and'foreign node'colors are not used yet.
Graph options
Use graph view by default
IDA switches to graph mode for each'jump'command.
Enable graph animation
Animate the graph layout,movement,and group collapsing/uncollapsing.
While animation takes time,it gives the user some idea what's going on.
Draw node shadows
Display shadows for each graph node.Shadows are not displayed
for really huge or ridiculously small nodes.
Auto fit graph into window
Zoom the graph so that it occupies the whole window.
Fit window max zoom level 100%
The'fit window'command maximal zoom level is 100%.
Re-layout graph if nodes overlap
IDA recomputes the graph layout if a node overlap is detected.
The presence of a custom layout(if the user has displaced
some graph nodes)effectively turns off this option.
Re-layout graph uopn screen refresh
IDA recomputes the graph layout at each screen refresh.
Turning this option off accelerates IDA but then
a manual layout might be required after some operations.
Truncate at the right margin
All nodes at truncated at the right margin.The right margin
is specified in the Options,General,Disassembly tab.
This option narrows the graph but hides some information
by truncating long lines.
Lock graph layout
Locks the graph layout by ignoring attempts to displace
nodes.This prevents the creation of custom layouts that might lead
to ugly graph layouts when nodes change their sizes.
PROXIMITY VIEW
Show data references
Show data cross-referenced items in proximity view.
Hide library functions
Do not show data or code cross-references to library functions,
only show cross-referenced local functions.
Unlimited children recursion
Recurse until there are no more callees(children)of the currently
selected central node and all of his children.
Recurse into library functions
Displays children data or code cross-references from library
functions.
Max parents recursion
Maximum recursion level for displaying parents of the currently
selected central node.The value'0'disables parents recursion.
Max children recursion
Maximum recursion level for displaying children of the currently
selected central node.The value'0'means no maximum recursion
level.
Max nodes per level
Maximum number of nodes to show per level of children and parents.
中文翻译如下:
Proximity view是IDA v6.2引入的一个功能,可以将程序的调用图以图形形式展示出来。当前地址、调用方和被调用方被表示为一组连接在一起的节点和边缘。节点代表函数和数据引用(全局变量、字符串等),边缘代表它们之间的代码或数据交叉引用。
在Proximity view中,只显示地址名称(函数名称或数据标签),但不显示反汇编,然而,在节点上悬停鼠标会在一个可调整大小的提示窗口中显示简要的反汇编清单。要查看完整的反汇编清单,请按"+"或空格键分别切换到文本或图形模式。
在Proximity view中有3种类型的节点:函数节点、数据节点和辅助节点。函数节点呈矩形,它们具有工具栏。这些节点用于显示当前中心节点(或其任何父节点或子节点)的调用方或被调用方。数据节点是矩形节点(没有工具栏),它们用于显示到/从当前中心节点或其任何父节点和子节点的数据引用(全局变量、字符串等)。
在图形中进行的许多操作都会应用到已选择的节点上。对于所有操作都会将当前节点视为节点选择的一部分。
可以使用鼠标选择图形中的节点。在鼠标操作期间按住Ctrl键可以一次选择多个节点,按住Alt键可以从当前选择中移除节点。
IDA会内部跟踪已选择的节点和边缘布局点。边缘布局点是边缘弯曲的点。如果在图形中移动当前选择的节点,则所选中的边缘布局点也会随之移动。
已选中节点标题的默认颜色是浅灰色,其他节点标题是白色的。
图形缩放
有几种方法可以缩放图形:
-使用Ctrl+鼠标滚轮。当前鼠标位置将是缩放中心点(即在缩放过程中,该点不会移动)。
-使用预定义的“100%缩放”和“适合窗口”命令。它们可以通过右键单击菜单或其快捷方式“1”和“W”来使用。对于“100%缩放”命令,当前鼠标位置是缩放中心点。
-使用Ctrl+KeypadPlus或Ctrl+KeypadMinus键。这些命令的缩放中心是当前键盘光标。
-使用Ctrl+Shift+拖拽。这使您可以绘制一个矩形,IDA将缩放到该矩形中。
与图形缩放有关的有两个选项:
-自动适应图形大小:可以适应当前图形窗口大小。默认情况下:关闭。
-适合窗口最大缩放级别100%:适合窗口命令不使用高于100%的缩放级别。默认情况下:开启。
缩放级别不能大于1000%,也不能小于1%。IDA为导航历史记录中的每个位置记住当前的缩放级别。
滚动图形
用户可以通过在图形背景上点击鼠标左键并拖动来平移(移动)图形。在极少数情况下,当屏幕上没有可见的图形背景时,可以使用Shift+单击来移动图形。这可能发生在非常高的缩放级别下,当当前节点占据整个窗口时。
鼠标滚轮可以垂直滚动图形。如果按下Alt键,则可以水平滚动图形。
Page Up和Page Down键可以垂直滚动图形。如果键盘箭头到达节点边界并且不能跳转到指定方向的另一个节点,则可以滚动图形。
滚动图形不会改变键盘光标位置。一旦图形在屏幕上刷新,IDA将滚动图形,使键盘光标可见。
图形概览窗口
IDA有一个小的图形概览窗口。它以缩小的形式显示整个图形,并让用户了解图形的哪部分在主窗口中被可视化。
在图形概览窗口上单击可以在主窗口中可视化不同部分的图形。还可以单击并拖动焦点框-主窗口将相应地刷新。
图形概览窗口仅在图形视图节点中可见。一旦另一个非模态窗口获得焦点,图形概览将关闭。当激活图形视图时,它会自动打开。
默认情况下显示图形概览。要隐藏它,请右键单击主工具栏背景,然后选择导航、图形概览菜单项。
可以调整图形概览窗口的大小以容纳真正巨大的图形。
图形颜色
图形边缘可以有多种颜色。在图形视图中:
●蓝色:正常的边缘
●绿色:如果执行跳转(其条件被满足)
●红色:如果未执行跳转
●闪烁:在调试器中,将要遵循的边缘会闪烁在接近视图中:
●蓝色:代码交叉引用边缘
●灰色:数据交叉引用边缘IDA突出显示当前鼠标项。如果鼠标悬停在边缘上,则会突出显示。如果鼠标悬停在节点上,则所有相邻的边缘都会突出显示。要关闭突出显示,请将“当前边缘”颜色指定为未定义的自定义颜色。“突出显示的边缘”和“外部节点”颜色尚未使用。
图形选项
默认使用图形视图
IDA为每个“跳转”命令切换到图形模式。
启用图形动画
动画显示图形布局、移动和组折叠/展开。
虽然动画需要时间,但它给用户一些了解正在发生的事情。
绘制节点阴影
为每个图形节点显示阴影。对于非常大或过小的节点不显示阴影。
自适应图形窗口
缩放图形,使其占据整个窗口。
窗口最大缩放级别为100%
“适合窗口”命令的最大缩放级别为100%。
如果节点重叠,则重新布局图形
如果检测到节点重叠,则IDA会重新计算图形布局。
存在自定义布局(如果用户已经移动了某些图形节点),则实际上会关闭此选项。
屏幕刷新时重新布局图形
IDA在每次屏幕刷新时重新计算图形布局。
关闭此选项可以加速IDA,但是在一些操作之后可能需要手动布局。
在右边距处截断
所有节点都在右边距处截断。右边距在Options、General、Disassembly选项卡中指定。
此选项会缩小图形,但通过截断长行隐藏了一些信息。
锁定图形布局
通过忽略对节点的移动尝试来锁定图形布局。这可以防止创建可能导致丑陋的图形布局的自定义布局,当节点改变大小时。
接近视图
显示数据引用
在接近视图中显示数据交叉引用项。
隐藏库函数
不显示到库函数的数据或代码交叉引用,只显示交叉引用的本地函数。
无限制的子递归
直到当前选择的中心节点及其所有子节点的被调用者(子节点)没有更多为止递归。
递归到库函数
从库函数显示子数据或代码交叉引用。
最大父级递归
显示当前选择的中心节点的父级的最大递归级别。值“0”会禁用父级递归。
最大子级递归
显示当前选择的中心节点的子级的最大递归级别。值“0”表示没有最大递归级别。
每个级别最大节点数
每个子代和父代级别要显示的最大节点数。
展开阅读全文
︾
 400-8765-888
 kefu@makeding.com
专业销售为您服务

读者也喜欢这些内容:
IDA Pro如何分析加密数据 IDA Pro怎么给加密数据解密
在逆向工程的实际操作中,分析目标程序时最常遇到的问题之一就是“加密数据”。不论是配置文件、通信内容,还是程序内部的关键字符串,这些信息通常会被以某种方式加密存储或传输,以增加破解和分析的难度。针对这种情况,IDAPro如何分析加密数据,IDAPro怎么给加密数据解密就成为了每一位逆向分析人员都必须掌握的重要技能。本文将从加密数据识别、加密算法逆向、自动解密脚本构建等方面,系统解析如何利用IDAPro完成加密数据的分析与还原。...
阅读全文 >
IDA Pro怎么分析虚拟机代码 IDA Pro虚拟机逆向工程
虚拟机(VM)加密与保护技术在现代软件保护中被广泛应用,它通过将原始指令转换为自定义的“虚拟指令”并在运行时由虚拟解释器执行,从而有效防止逆向分析。这种方法不仅提高了解析门槛,还极大增加了逆向工程的复杂度。面对这种高级保护手段,IDAPro怎么分析虚拟机代码,IDAPro虚拟机逆向工程成为很多逆向人员关注的重点话题。本文将围绕该问题展开,从识别虚拟机存在、分析VM架构、拆解虚拟指令到利用IDA工具进行自动化分析,提供一套系统化的解决路径。...
阅读全文 >
怎么用IDA软件反汇编功能学习汇编指令 IDA反汇编功能如何进行多平台二进制分析
说到反汇编分析,很多人第一时间就会想到IDA。这款工具可以说是做逆向工程的“神器”,不管是学习汇编指令还是分析二进制文件,都非常给力。如果你是个初学者,刚接触反汇编,可能会对IDA的一些功能感到陌生,比如怎么用IDA软件反汇编功能学习汇编指令 IDA反汇编功能如何进行多平台二进制分析。别急,今天就带你一步步搞清楚。...
阅读全文 >

IDA怎么提取数据?如何利用IDA反编译功能提取程序中的字符串信息?
在软件分析和逆向工程领域,IDA Pro作为一款强大的反编译和反汇编工具,广泛应用于程序分析、代码破解、漏洞研究等方面。对于许多逆向工程师和安全研究人员来说,使用IDA Pro提取数据和字符串信息是常见的需求。本文将详细探讨“IDA怎么提取数据?”和“如何利用IDA反编译功能提取程序中的字符串信息?”这两个问题,并分析IDA Pro是否具有AI功能。...
阅读全文 >
 汽车安全
汽车安全  金融保险
金融保险  游戏开发
游戏开发  网络安全与防护
  工业4.0应用升级产业
  渗透测试
渗透测试  教育
教育  知识产权
知识产权 司法鉴定
司法鉴定 